Here’s a little tutorial on how to draw Mickey Mouse on your Glow Art Light Up Kids’ drawing board. We’ve used a print of Mickey and put it underneath the drawing board to make it easier for younger children, but his lines are fairly simple and with a little practice many kids will be happy to do this freehand! Another option is to take a tablet or iPad and put that underneath GlowArt, if you don’t want to print out the drawing.
In this tutorial, we’ve also used what we call the ‘frozen effect’ to make the drawing extra cool 😉 This is a technique we use to create a ‘frozen ice’ like effect on the drawing screen, using a little water. This gives a nice semi-transparent effect lit up by the LEDs in the screen.

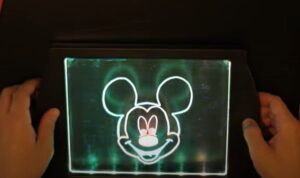
This is what we’re looking to end up with, so… let’s do it!
The first thing we need to do (if we’re going down the tracing route) is to place our picture of Mickey underneath the board. Then we simply start carefully following the simple lines with one of the neon effect marker pens.

Next up, we’ll use several colours of the neon-effect pens, because that’s what gives Glow Art it’s cool effects – the more colours you add to your drawing, the more interesting ways the fluorescent inks will interact with the different colour LEDs on the drawing board.

Now we’ve finished the basic tracing of Mickey Mouse’s face, let’s try a few different light-up modes to see what the LEDs do to transform our drawing so far. We’ll just press the button that controls the 36 different lighting effects, and see what it looks like!
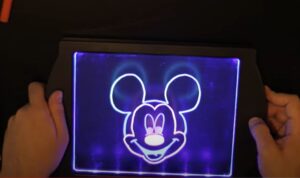
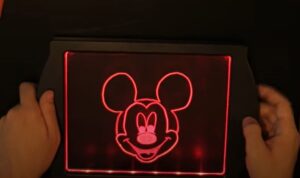
You can see the drawing changes colours completely depending on the mode, giving a kind of neon-like effect. What you can’t see is the different flashing and pulsing effects, transforming the picture in very cool ways! Anyway, let’s move on to add the ‘frozen effect’.
To get this cool effect, first, turn the drawing board over, so we can use the other writing surface. Glow Art allows you to write or draw on both sides of the screen, and because of the thickness of the screen, it also gives a bit of a ‘3D’ effect as well. Nice!
So all we’re going to do is, scribble some ink over the back drawing surface, and then add a couple drops of water. Literally, just a couple of drops, don’t overdo it! Then take a soft cloth or tissue and just wipe the wet ink across the screen in long strokes, trying to cover all the way to the edges. Once you’ve done that, tilt the board at a 45 degree angle, and gently blow across the ink. It will quickly dry as you’re blowing, giving a cool ‘freezing’ effect.

Next, we’ll highlight Mickey’s face by erasing the dried ‘frozen’ ink from that part of the drawing. You can use your finger or maybe better a tissue over your finger to save washing your hands!

And last but not least, just for fun, we’re going to add a little decoration to Mickey’s ears to make the drawing more fun!

So there you have it, the pièce de résistance, the final artwork, Glowing wonderfully on the Glow Art light-up kids drawing board! You can also see the video here .
If you’d like to know more about the Glowart kids’ drawing board or the new Sonic Glow Pad featuring sound activated lighting effects on a smaller drawing pad, please click on the links. We hope you enjoyed this tutorial.
Glow Art – the original and best LED Drawing Boards for Kids!